


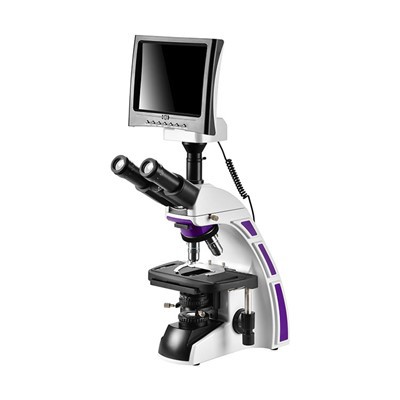
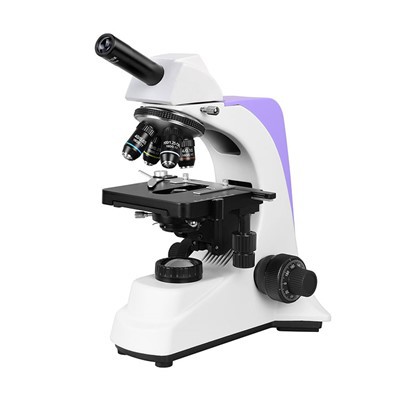
Microscope
Why Choose Us?
1. Rich Experience
By several years development, we have become a professional supplier for different kinds of microscopes, telescopes, binoculars, magnifiers, spotting scopes, riflescopes and accessories.
2. Reliable Product Quality
We practise ISO9001:2015 quality standard. Our all microscopes have passed CE certificate, some items has ROHS certificate. The astronomical telescope and binoculars also passed EN71 certificate.
3. Professional Technical Team
Our experienced workers and strict inspection system guarantee that goods will be with best quality before shipment. R&D team continuously optimizes available models and designs new models to keep our products' competition in the market.
4. Customizable Services
We can supply OEM and ODM service, additionally we can offer other service, such as logo printing, color box design, shipment arrangement, etc.
What is Microscope?
A microscope is a piece of scientific equipment that lets us see very small things that our eyes otherwise couldn't see. The microscope uses lenses, similar to those in glasses or a magnifying glass, to make things look bigger – this is called magnification.


1. Magnification and Resolution
Magnification allows scientists to observe and study objects at a much larger scale, enabling them to examine the fine details and structures that are not visible to the naked eye. This is particularly important in fields such as biology, where the study of cells, tissues, and microorganisms requires a high level of magnification. By magnifying these objects, scientists can better understand their functions, interactions, and overall behavior. Resolution, on the other hand, is equally important as it determines the level of detail that can be observed. A microscope with high resolution can distinguish between closely spaced objects, allowing scientists to study the intricate structures within cells or the fine features of microorganisms. This level of detail is crucial in various scientific disciplines, including medicine, genetics, and materials science.
2. Scientific Research and Discovery
The microscope is an essential tool in scientific research and discovery due to its ability to magnify and visualize objects that are otherwise invisible to the naked eye. It has revolutionized various fields of study, including biology, medicine, chemistry, and materials science, by enabling scientists to observe and understand the intricate details of the microscopic world. One of the primary reasons why microscopes are important is their role in advancing our knowledge of the natural world. By allowing scientists to observe and study cells, microorganisms, and other tiny structures, microscopes have played a crucial role in the development of the cell theory, the discovery of bacteria and viruses, and the understanding of complex biological processes. Microscopes have also been instrumental in the field of medicine, aiding in the diagnosis and treatment of diseases by enabling the visualization of pathogens and abnormalities at the cellular level.
3. Medical Diagnostics and Pathology
The microscope is an essential tool in the field of medical diagnostics and pathology. It allows healthcare professionals to examine and analyze various specimens at a microscopic level, providing valuable insights into the diagnosis and treatment of diseases. One of the primary reasons why microscopes are important in medical diagnostics is their ability to visualize and identify cellular and tissue abnormalities. By examining blood, urine, or tissue samples under a microscope, doctors can detect the presence of pathogens, abnormal cells, or other indicators of disease. This information is crucial for accurate diagnosis and appropriate treatment planning. Moreover, microscopes enable pathologists to study the structure and function of tissues and organs in detail. This helps in identifying the nature and extent of diseases, such as cancer, infections, or autoimmune disorders. Microscopic examination also aids in determining the stage of a disease, which is vital for prognosis and selecting the most effective treatment options.
4. Industrial Quality Control and Inspection
Microscopes play a crucial role in industrial quality control and inspection processes. They provide a magnified view of objects, allowing for detailed analysis and examination of various materials and components. Microscopes enable inspectors to identify and analyze defects that may not be visible to the naked eye. This is particularly important in industries such as electronics, automotive, and aerospace, where even minor defects can have significant consequences. Microscopes equipped with measurement tools, such as calibrated scales or digital imaging software, allow for accurate measurement of dimensions and tolerances. This ensures that products meet the required specifications and standards. Microscopes enable inspectors to examine the composition and structure of materials, helping to identify impurities, defects, or inconsistencies. This is crucial in industries where the quality and integrity of materials directly impact product performance and safety.
Types of Microscope
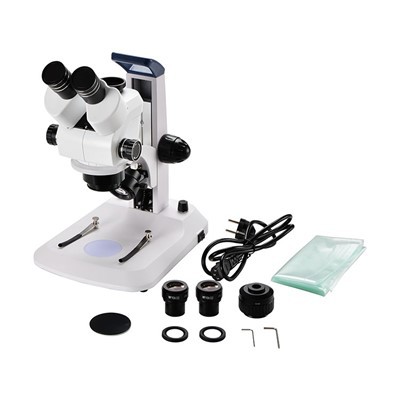
Stereo microscopes are used to look at a variety of samples that you would be able to hold in your hand. A stereo microscope provides a 3D image or "stereo" image and typically will provide magnification between 10x - 40x. The stereo microscope is used in manufacturing, quality control, coin collecting, science, for high school dissection projects, and botany. A stereo microscope typically provides both transmitted and reflected illumination and can be used to view a sample that will not allow light to pass through it.
A compound microscope may also be referred to as a biological microscope. Compound microscopes are used in laboratories, schools, wastewater treatment plants, veterinary offices, and for histology and pathology. The samples viewed under a compound microscope must be prepared on a microscope slide using a cover slip to flatten the sample. Students will often view prepared slides under the microscope to save time by eliminating the slide preparation process.
Inverted microscopes are available as biological inverted microscopes or metallurgical inverted microscopes. Biological inverted microscopes provide magnification of 40x, 100x and sometimes 200x and 400x. These biological inverted microscopes are used to view living samples that are in a petri dish. An inverted microscope allows the user to place the petri dish on a flat stage, with the objective lenses housed beneath the stage. Inverted microscopes are used for in-vitro fertilization, live cell imaging, developmental biology, cell biology, neuroscience, and microbiology.
Metallurgical microscopes are high power microscopes designed to view samples that do not allow light to pass through them. Reflected light shines down through the objective lenses providing magnification of 50x, 100x, 200x, and sometimes 500x. Metallurgical microscopes are utilized to examine micron level cracks in metals, very thin layers of coatings such as paint, and grain sizing. etallurgical microscopes are utilized in the aerospace industry, the automobile manufacturing industry, and by companies analyzing metallic structures, composites, glass, wood, ceramics, polymers, and liquid crystals.
Polarizing microscopes use polarized light along with transmitted and, or reflected illumination to examine chemicals, rocks, and minerals. Polarizing microscopes are utilized by geologists, petrologists, chemists, and the pharmaceutical industry on a daily basis. All polarizing microscopes have both a polarizer and an analyzer. The polarizer will only allow certain light waves to pass through it. The analyzer determines the amount of light and direction of light that will illuminate the sample.
Application of Microscope
The utility of Microscope in Life Science
The microscope is a major contributor to the life science field. Cell biology and histology are can get done with the use of a microscope. Over the years, the study of human blood cells has provoked further study of cells. The microscopes have contributed largely to the field of biology. The exceeding complexities hidden in biology can get explored with the microscope. The most popular type of microscope in biology is a compound light microscope. But, the stereotype of microscopes can be used for life science. Life science uses material and samples of large size.
Healthcare
Since, the microscopes contains a piece of glass in the form of a lens used to manipulate and view small objects. The mysteries of the human body were known. Like the protozoa, epithelial cells, bacteria were reasons to astonishment for the scientists. Hence, it evident how important microscopes are in healthcare since the discovery. For medical settings and global universities, microscopes have been acknowledged to be indispensable. Today’s world depends heavily on microscopes for healthcare studies. You encounter microscopes’ start from basics up to the pre-med level.
Research and Surgery
For conducting research work, medical schools or pharmacists use various types of microscopes. The role of principal investigators in lab is either to practice medicine. Besides they get seen lecturing students. The labs are equipped mostly equipped with research as well as teaching equipment. The most suitable microscope should be used. The use of medical microscopes is predominant in pharmaceutical and other research institutes. These companies spend no time in academia. They use much-advanced technology for cancer research or pathogens.
Correlation of Diagnosis and Microscopy
The invaluable tool in diagnosis is the electron microscope. For identifying a smaller specimen electronic microscope is superior to a light microscope. Electron microscopes can enable medical practitioners to view different cell parts more clearly. Parts like Cytoskeleton or Organelles, becomes more visible. If the electron microscopes get coupled with the digital microscope’s camera facilities. In such case the maximum amount of data can be shared and stored. From image, the healthcare professional can diagnose the patient’s health conditions.
Chemistry
In recent times liquid electron microscopy is popular. The guiding factor is analyzing chemicals in the liquid state is quite a boom. The use of electron microscopy can enable chemical scientists the different processes. The processes involved in chemical reactions. The study can be conducted till atomic transformation. To date, the electronic microscopes were dealing with solid samples. Recently it was discovered the microscopes are apt for liquid-phase samples as well. The study of liquid media using liquid-phase electron microscopy has revolutionized mechanics.
Components of Microscope


1. Head
The head is the uppermost part of the microscope and this head portion is also known as the body tube. It connects the eyepiece and objective lenses.
2. Arm
The arm is the structural part that connects the head part of the microscope to the base. It is also used for carrying the microscope.
3. Base
The base is the bottom of the microscope on which it stands. It provides overall support.
4. Eyepiece
The eyepiece is seen at the top of the microscope and it consists of two lenses: the ocular and the eyepiece. The power of an ocular lens usually varies from 5x to 30x.
5. Eyepiece Tube
It is located above the head portion of a microscope and it is used to connect the ocular lens and eyepiece to the objective lenses.
6. Nosepiece
Just below the eyepiece tube, the nosepiece is located. It is used to hold the objective lenses. The nosepiece is also known as a revolving turret. It is also used to change the magnification power by simply rotating it.
7. Objective Lenses
These are located just below the nosepiece. There are usually 3 to 4 objective lenses in a microscope with different magnification powers. Also, 4x (scanning objective), 10x (low power), 40x (high power), and 100x (oil immersion) are the most common kinds of objective lenses.
8. The Adjustment Knob
These are located over the objective lenses and these two adjustable knobs are commonly known as the Fine Adjustment Knob and the Coarse Focus Knob. T
9. Stage
It is a flat platform found just below the objective lenses and there is a test specimen/sample that is placed over it for simple viewing. Also, most microscopes consist of a mechanical stage that has a knob to control the slide.
10. Stage Clips
Every microscope has two stage clips and it is located just over the stage. The function of stage clips in the microscope is to hold the object/specimen slides in place.
11. Aperture
The aperture is the hole in the stage that is located just below the objective lenses. It helps in transmitting the base lightly to the stage.
12. Microscopic Illuminator
The optical microscope contains an internal source of light known as an illuminator. It is located at the base of the microscope. These work as a built-in light source of a microscope, and even catch the light from other external sources.
13. Rack Stop
It regulates the distance of the stages. Moreover, it also prevents the objective lens from being too close to the specimen slide. It is found over the stage.
14. Condenser
A condenser lens is used to illuminate the light that shines through the slides and helps attain the sharp images of the object to be studied or observed on the microscope stage. They have a very high magnification of 400X. These condensers that have high magnification powers usually produce a high-quality image.
15. Diaphragm
It is also known as iris, it helps change the intensity and the size of the cone of light that is illuminated upwards in the slide. Also, it is located just above the condenser.
How to Use a Microscope
1. Choose the right slide
Many microscopes come with a set of prepared slide. Choose one where you can easily see the specimen with your unaided eye. This will also make it easier for you to see the specimen under the microscope. After you have managed to look at the prepared slide, you can always make your own slides later.
2. No prepared slide?
If your microscope does not come with prepared slides, then you quickly have to make one yourself. Take a slide, put a drop of water on it. Cut off a small amount of hair (about 5mm long) and put it into the drop of water. They should not overlap too much. Put a cover glass on top. Of water flows out, then remove it with some tissue paper. If there are some air bubbles, then don’t worry for now. Just make sure that the cover glass sticks well on the slide because of the water. The cover glass should not float on the water when you move the slide (use tissue to remove excess water).
3. Adjust the objective
Rotate the 4x low power objective (the one with the red ring) into position. This will make focusing much easier.
4. Lower the stage
Turn the coarse focus knob and lower the stage. This will make it easier to insert the specimen slide.
5. Insert the slide
The label must be on top. This is the side that also has the cover glass. Make sure that the slide is centered properly. The specimen must be right above the hole on the microscope’s stage.
6. Raise the stage
Use the coarse focus knob to raise the stage all the way. Check that it does not crash into the objective (it should not, because you will not be able to turn it higher with the 4x objective in place.)
7. Turn on the microscope
You need to turn on the main switch first. If it does not light up, then you need to turn the light intensity knob (or wheel).
8. Raise the condenser
Some better microscopes have a condenser mounted beneath the stage. Find the knob (on the left side beneath the stage, or a horizontal lever) and raise the condenser all the way up. You should be able to see the condenser go up and down. This is not the lever that controls the diaphragm.
9. Close the diaphragm
This is a lever on the condenser that can be moved left and right. It does not raise and lower the condenser, but opens and closes the diaphragm. Move the lever to the position where the image becomes the darkest. This will also give you the highest contrast and depth of field. If it is too dark, turn up the light.
10. Focus
Now look through the microscope and use the coarse focus knob (the large one) to lower the stage until you see a clear image. Don’t just rotate it back and fourth, but rotate it into one direction. If you do not see a clear image at all, check that the slide is centered.
11. Recenter
This is important. The part that you want to look at more closely should be in the middle.
12. Change magnification
Now you can rotate the next higher objective into position. This is the 10x objective. The objective will be very close to the slide, but do not worry, it will not touch the slide – if it was in focus with the 4x objective. Some beginners are afraid that it will touch the slide and will move the stage down again before changing the objective, but this is wrong.
13. Refocus
Now use the fine focus knob to focus. If you use the coarse focus knob then there is indeed the risk of crashing the objective into the slide and damaging both. If you lose the focus, which can happen easily, then start again with the 4x objective. This is faster and safer than trying to find the focus using a higher magnification.
14. Open the condenser
Experiment with the condenser aperture diaphragm. Open and close it until you get am image that is satisfactory. Different specimens will require a different condenser. Specimens that are low in contrast need to have the condenser closed more.
Understanding Microscope Magnification
To calculate the total magnification of a microscope, you need to multiply the magnification of the objective lens by the magnification of the eyepiece. The objective lens is the lens closest to the specimen, and the eyepiece is the lens closest to your eye. For example, if the objective lens has a magnification of 10x and the eyepiece has a magnification of 20x, the total magnification would be 200x (10 x 20 = 200). It is important to note that the total magnification is not the only factor that determines the quality of the image. Other factors such as resolution, contrast, and depth of field also play a role in the clarity and detail of the image.
Calculating Total Magnification
Total magnification is a crucial aspect of microscopy, as it determines the level of detail and clarity of the image produced. To calculate the total magnification of a microscope, you need to multiply the magnification of the objective lens by the magnification of the eyepiece. The objective lens is the lens closest to the specimen, and its magnification is usually indicated on the lens itself. The eyepiece, on the other hand, is the lens that you look through, and its magnification is usually indicated on the side of the eyepiece. For example, if the objective lens has a magnification of 40x and the eyepiece has a magnification of 10x, the total magnification would be 400x (40 x 10 = 400).


Determining Eyepiece and Objective Lens Power
How to calculate total magnification of a microscope is a fundamental question for anyone using a microscope. The total magnification of a microscope is the product of the magnification of the eyepiece and the objective lens. The eyepiece magnification is usually 10x, while the objective lens magnification can vary from 4x to 100x or more, depending on the type of objective lens used. To determine the total magnification of a microscope, you need to know the magnification of the eyepiece and the objective lens. Once you have this information, you can simply multiply the two magnifications together to get the total magnification.
Multiplying Eyepiece and Objective Lens Magnification
To calculate the total magnification of a microscope, you need to multiply the magnification of the eyepiece by the magnification of the objective lens. The eyepiece typically has a magnification of 10x, while the objective lens can range from 4x to 100x or more, depending on the type of lens being used. For example, if you are using a microscope with a 10x eyepiece and a 40x objective lens, the total magnification would be 10 x 40 = 400x. This means that the image you are viewing through the microscope is magnified 400 times larger than its actual size.
How Do I Correctly Turn on the Microscope?
Make sure that the light intensity is set to “low” before turning on. Otherwise the cold lamp will receive a high current and the chance of the lamp burning out is higher. Turn the intensity to low also before switching off. LEDs are not sensitive in this respect, but I still recommend to stick to the recommended procedure.
● Make sure that the microscope is turned off and that the light intensity is set to “low”.
● Plug in the microscope.
● Turn the microscope on. The lamp should not go on.
● Now increase the light intensity to an acceptable level.
How Do You Clean Microscope Lenses ?
Cleaning microscope lenses is a crucial task to ensure accurate and clear observations. The process requires careful handling to avoid damaging the delicate lenses. Traditionally, the recommended method for cleaning microscope lenses is by using a lens cleaning solution and a lens tissue. To clean microscope lenses, start by gently blowing away any loose dust or debris from the lens surface. This step helps prevent scratching the lens during the cleaning process. Next, apply a few drops of a lens cleaning solution onto a clean lens tissue. It is important to use a solution specifically designed for cleaning lenses, as other cleaning agents may damage the lens coatings.
Using compressed air or a blower brush is one of the most effective methods for cleaning microscope lenses. Microscope lenses are delicate and require special care to maintain their clarity and functionality. Dust, debris, and fingerprints can accumulate on the lenses, affecting the quality of the images produced. Compressed air or a blower brush can be used to remove loose particles from the lens surface. This method is preferred because it minimizes the risk of scratching the lens. When using compressed air, it is important to hold the canister upright and use short bursts of air to prevent any moisture from being released onto the lens. A blower brush, on the other hand, can be gently swept across the lens surface to dislodge any particles.
To clean microscope lenses, it is crucial to follow proper techniques to avoid damaging the delicate lenses and ensure accurate observations. One of the most important rules is to avoid touching the lens directly with fingers. This is because fingers can leave behind oils, dirt, and smudges that can obstruct the view and potentially damage the lens. To clean microscope lenses effectively, start by using a soft brush or air blower to remove any loose particles or dust from the lens surface. This step helps prevent scratching the lens during the cleaning process. Next, use a lens cleaning solution specifically designed for optical lenses. Apply a small amount of the solution to a clean, lint-free microfiber cloth or lens tissue.
Cleaning microscope lenses is an essential task to ensure accurate and clear observations. The process requires delicacy and precision to avoid damaging the lens. The most common method for cleaning microscope lenses is to use a gentle, circular motion. To begin, it is important to remove any loose debris or dust particles from the lens. This can be done by using a soft brush or a can of compressed air to gently blow away any visible particles. It is crucial to avoid touching the lens directly with any objects or materials, as this can cause scratches or damage. Once the loose debris has been removed, a lens cleaning solution specifically designed for microscope lenses can be used. Apply a small amount of the solution to a clean, lint-free cloth or lens paper. It is important to avoid using regular tissues or paper towels, as they can leave behind lint or scratch the lens.
Ningbo Barride Optics Co., Ltd is a manufacture-based company about optical and electronic products. Located in the beautiful port city Ningbo, which has convenient transportation. By several years development, we have become a professional supplier for different kinds of microscopes, telescopes, binoculars, magnifiers, spotting scopes, riflescopes and accessories. At the same time, we also export night vision, rangefinder, compass and other optical products according to clients' requirements.

We practise ISO9001:2015 quality standard. Our all microscopes have passed CE certificate, some items has ROHS certificate. The astronomical telescope and binoculars also passed EN71 certificate.


Ultimate FAQ Guide to Microscope
We're professional microscope manufacturers and suppliers in China. If you're going to buy or wholesale bulk microscope at competitive price, welcome to get pricelist and quotation from our factory. Also, customized service is available.
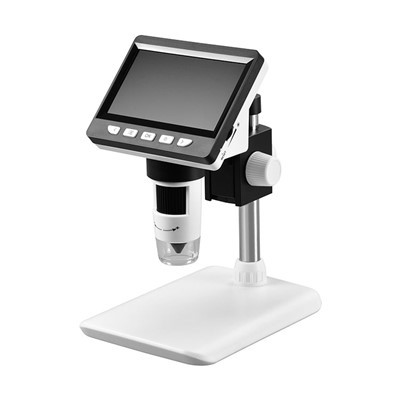
Handheld Digital Microscope, Jewelry Tool Magnifier, Led Biological Microscope